98-0148 (From Rice to Nice)

Feel free to discuss anything about the late 80s to early 00s Hondas and Acuras!
Vtecwreck
Posts: 178
Joined: Tue Aug 15, 2017 4:49 pm

Re: 98-0148 (From Rice to Nice)

Post by Vtecwreck » Sun Aug 26, 2018 2:26 pm

Life’s keeping me too busy! But I was finally able to drop in the engine and transmission! I decided not to paint them because I am looking for a more authentic look and I am not a fan of the way they look painted. Just personal preference! By no means does it look brand new or close to it. It looks weathered and I’m fine with it as long as it’s clean and free of oil. It took me about a day to set everything up ( install clutch, mate engine and transmission, etc.). Throughout the whole weekend the rain was on and off, luckily, I brought out my canopy so we were still able to do some work. The following day I plugged up the harness and dropped it in. Don’t mind the crappy valve cover as it’s just temporary. As always, nothing ever goes as planned, I purchased a blox intake manifold as an upgrade to the stock GS-R manifold. Turns out that with the blox manifold requires longer studs and no one locally has them in stock. I went on JHPUSA and ordered them, I also made a quick list of things I needed in order to finish up running the harness and swap:

-OEM ITR Throttle Cable Bracket
-Oem Knock sensor
-Extended Intake Studs
-Exedy Clutch Slave
-Enegery Suspension Shifter Bushings
-OBD2 Distributor
-OBD2 Alternator

To make things even better, these parts arrived the night before I left for vacation! So after this update they will be installed and hopefully we can get it started. These are the only pictures I have of the process, lighting kinda sucks when you’re working out in the open.

Getting ready to attach it to the hoist:
IMG_3831.JPG
IMG_3831.JPG (699.11 KiB) Viewed 857 times
In and bolted on:
IMG_3843.jpg
IMG_3843.jpg (714.24 KiB) Viewed 857 times
Last edited by Vtecwreck on Sun Jan 29, 2023 5:51 pm, edited 1 time in total.
98-0148: DeRicing Project
viewtopic.php?f=5&t=264

Vtecwreck
Posts: 178
Joined: Tue Aug 15, 2017 4:49 pm

Re: 98-0148 (From Rice to Nice)

Post by Vtecwreck » Tue Sep 04, 2018 8:42 pm

So I was able to turn heR on! This is more than just putting a car together. I’ve never really done this before, it’s been a journey and it’s not even done yet. This is pushing me to make the final strides to finish heR up.

I can now officially say that the car is complete body wise! Finally after 6 months (start to finish) I received the final body panel. The hatch was the last piece of the puzzle. Maybe it’s just me but the lack of a hatch made me appreciate it when i installed it. As a one man job it wasn’t the easiest. Hence, why it’s misaligned.
I have to say the most challenging part of the installation was the wire harness. Before removing it, I was told to just cut it and splice it after, this was absolutely no help. Least to say, I figured it out on my own. I figured since pulling the harness out was a bit of a struggle, passing it through wasn’t going to be any easier. So here’s what I did: I wrapped the harness in seran wrap (tape would work fine). I had to make sure that none of the plugs were overlapping each other so the harness wasn’t bulging in any part making it hard to pass it through. Lastly, I put 6 long zip ties together making sure it was long enough to reach both openings on the hatch. I taped the joints flat so they wouldn’t get stuck anywhere and passed it through. I then added another zip tie at the end and used a smaller one around the plug to form a secure pulling point. Once it was threaded through I undid the zip ties and unwrapped the harness.

Onto the pictures:

Slapped on itr valve cover:
IMG_4085.jpg
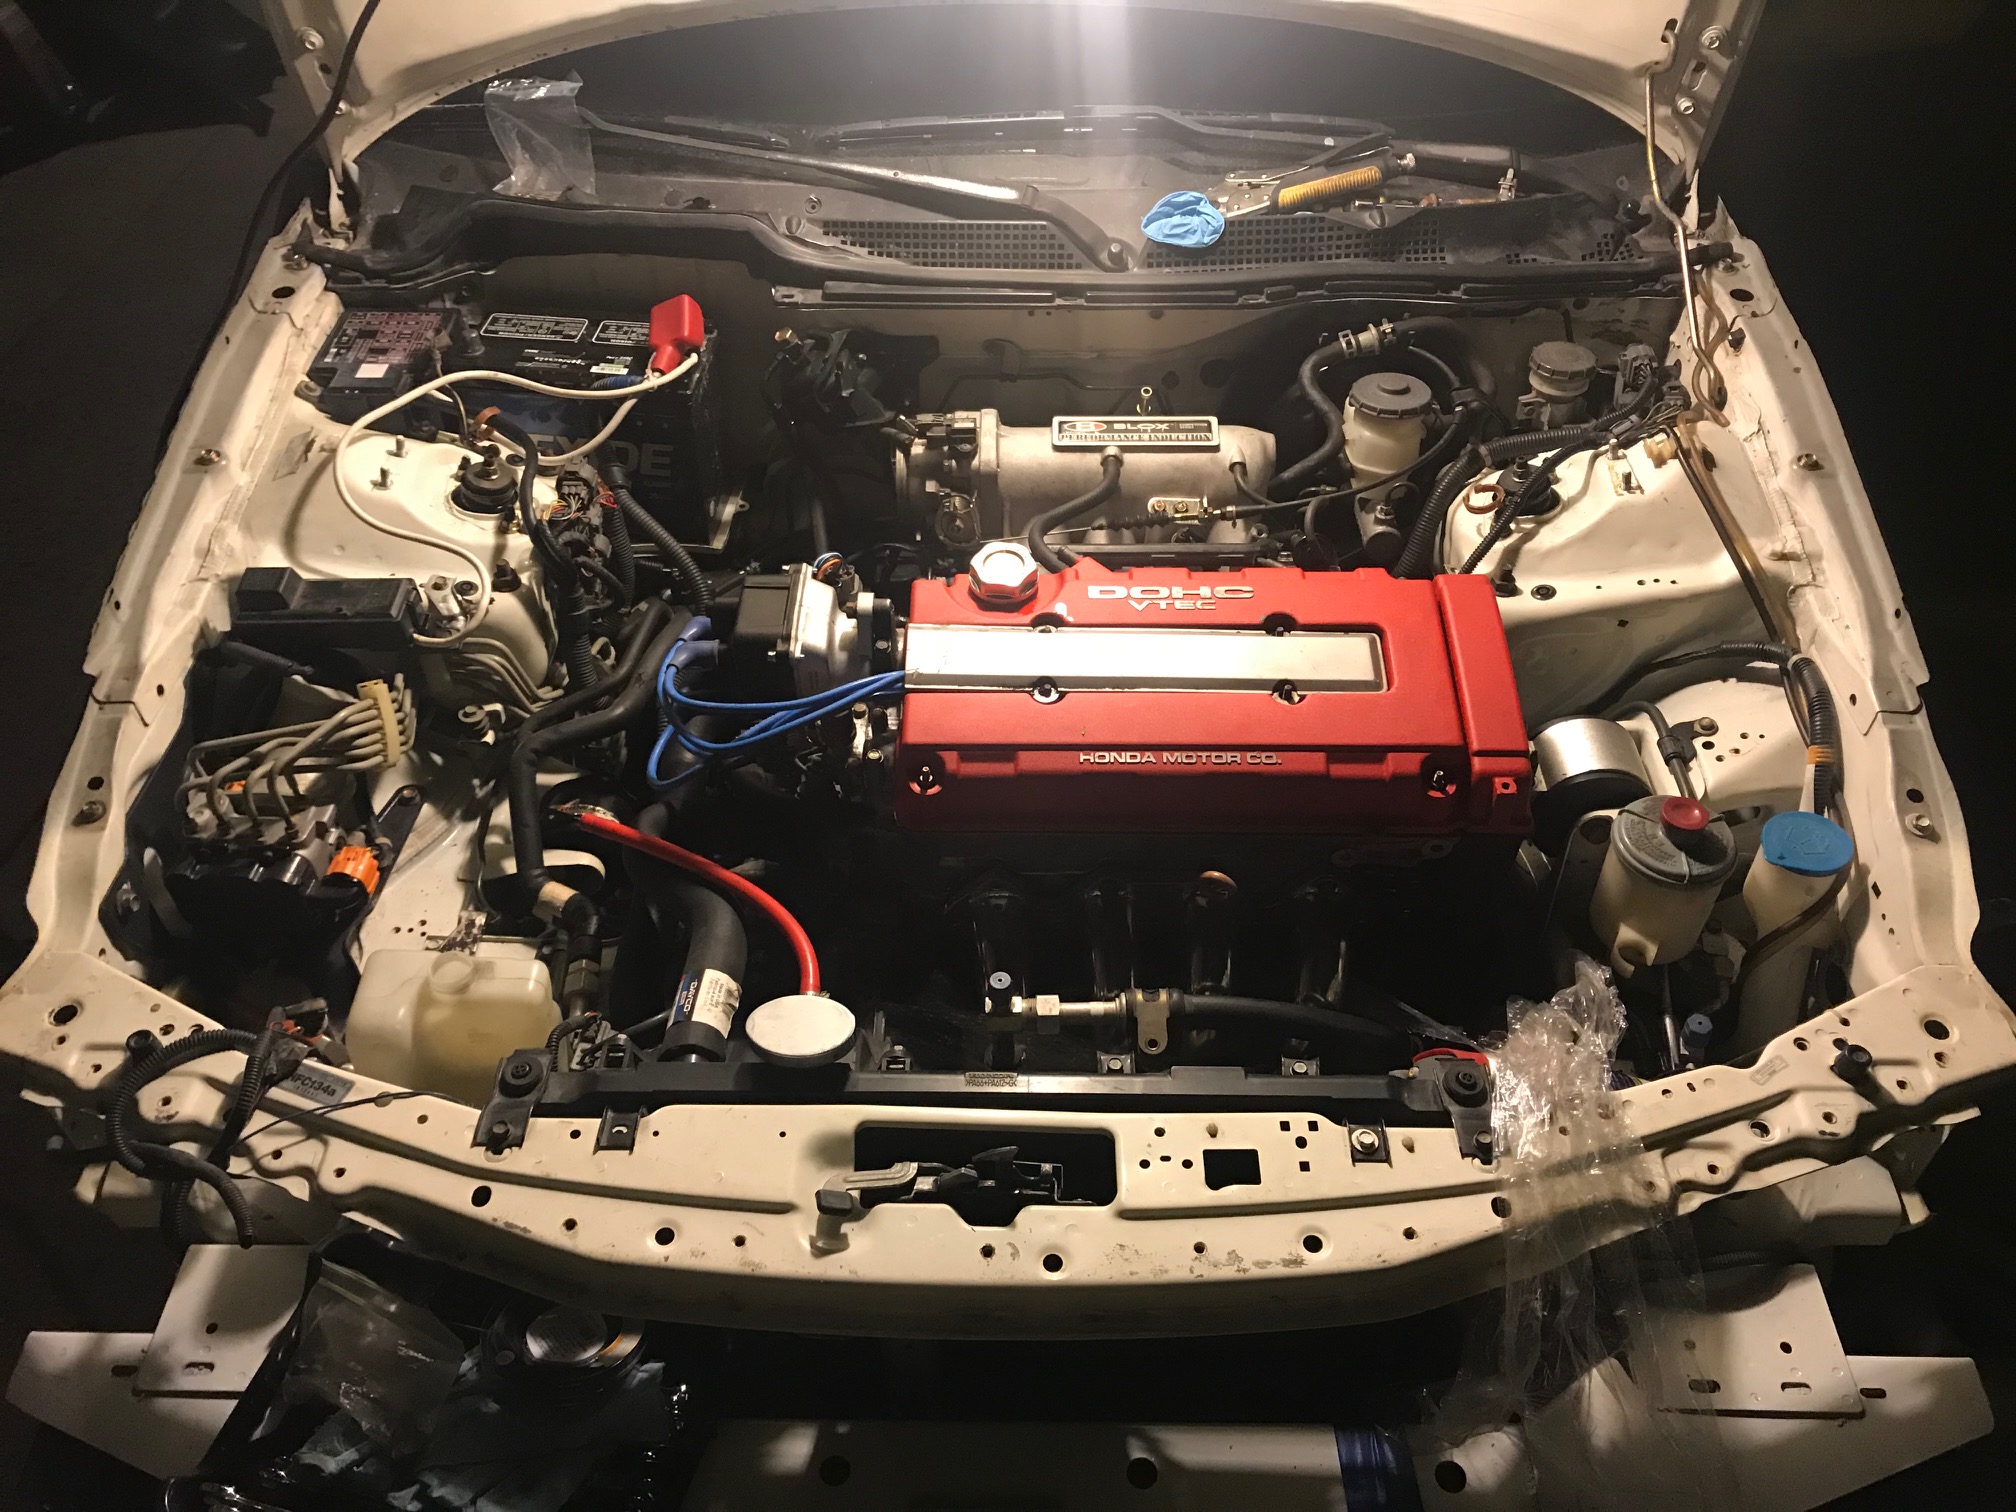
IMG_4085.jpg (712.4 KiB) Viewed 856 times
Hatch and spoiler installed:
IMG_4105.jpg
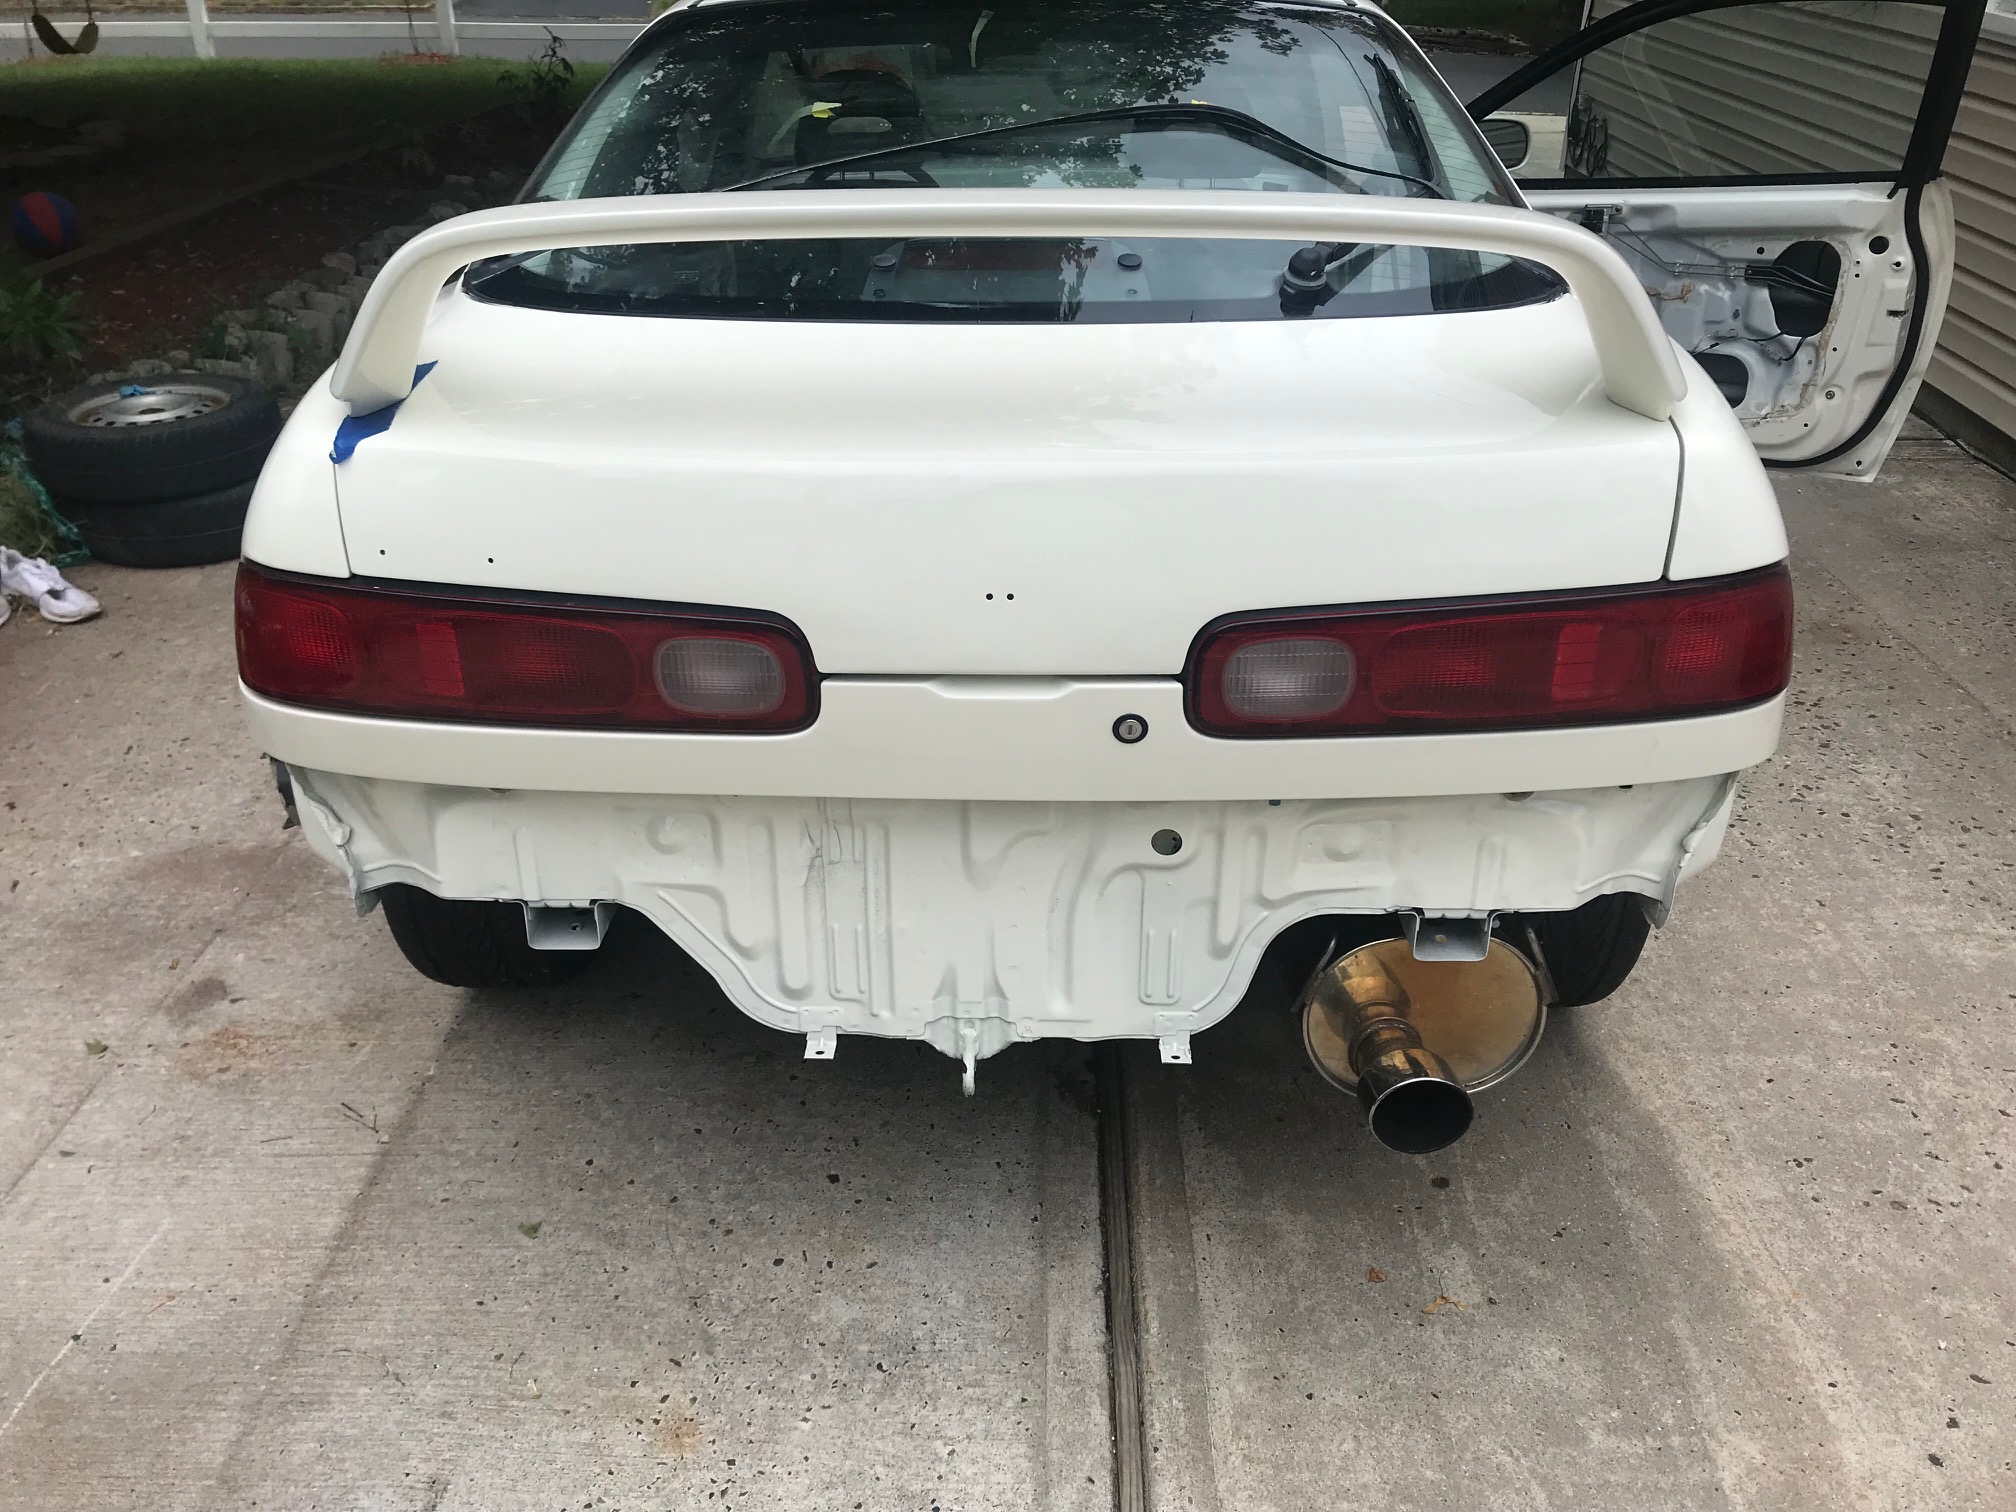
IMG_4105.jpg (749.39 KiB) Viewed 856 times
My migivered harness puller :lol:
IMG_4100.jpg
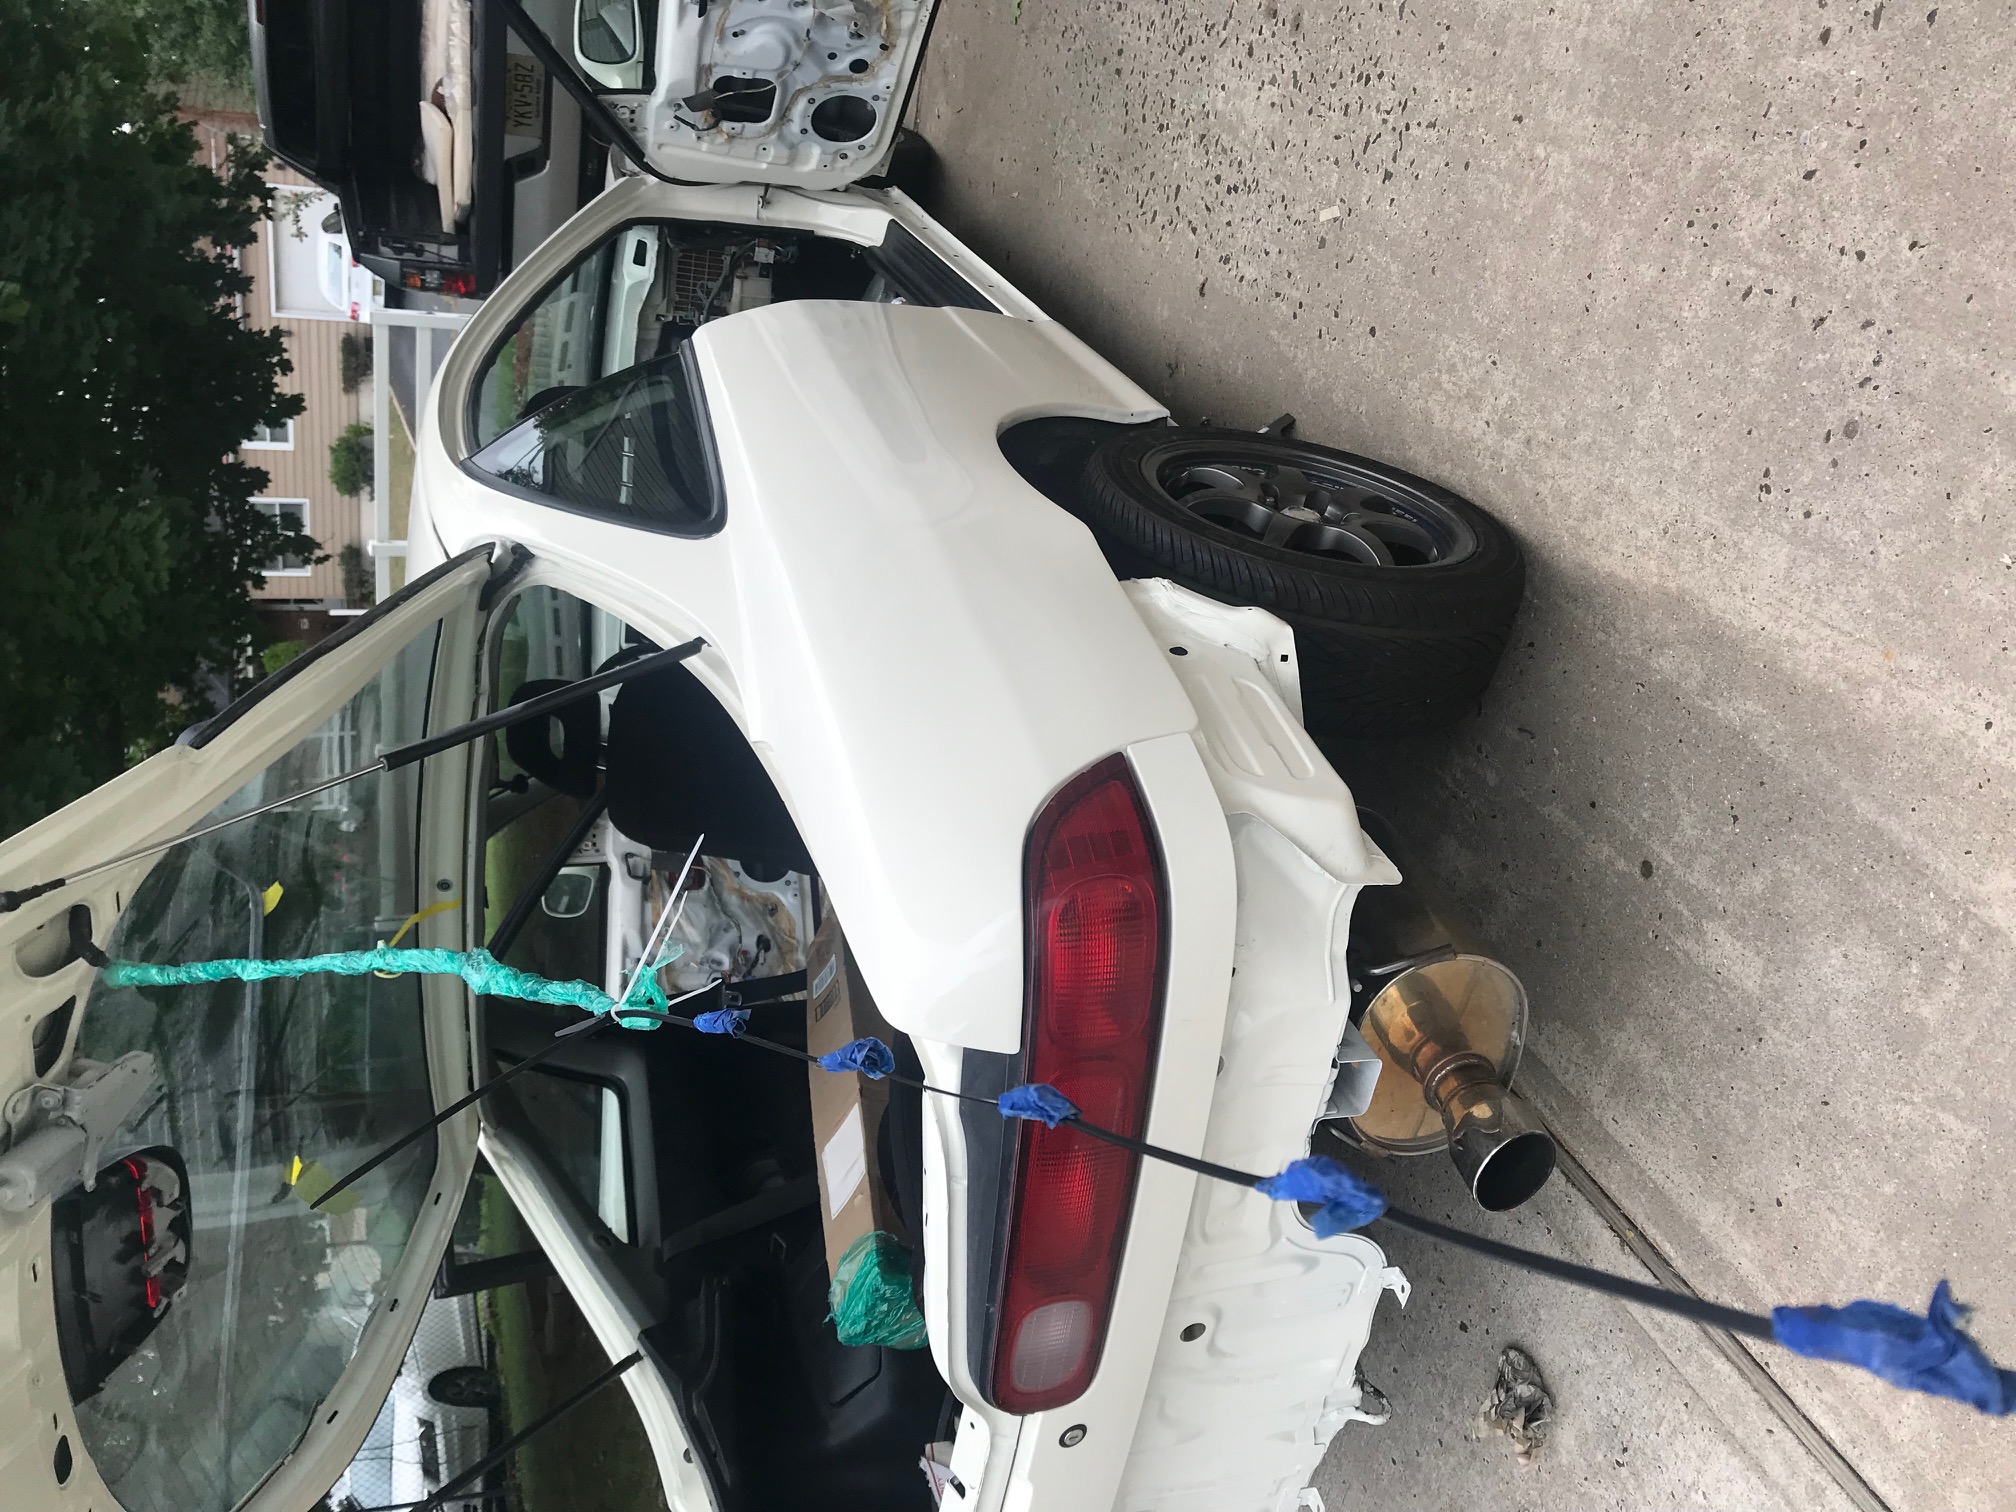
IMG_4100.jpg (829.81 KiB) Viewed 856 times
Last edited by Vtecwreck on Sun Jan 29, 2023 5:58 pm, edited 1 time in total.
98-0148: DeRicing Project
viewtopic.php?f=5&t=264

User avatar
aklackner
Posts: 1095
Joined: Fri Dec 01, 2017 9:40 am

98-0148 (From Rice to Nice)

Post by aklackner » Tue Sep 04, 2018 10:10 pm

Congratulations!!!

Did you pull the harness out of the hatch or the body?

Pulling the harness out of the body is much easier imho.

Then you can deal with the harness in the hatch off the car (and not upside down.

User avatar
RTW DC2R
Posts: 566
Joined: Sun Aug 13, 2017 6:21 pm
Location: Dirty Jersey

Re: 98-0148 (From Rice to Nice)

Post by RTW DC2R » Thu Sep 06, 2018 9:26 am

Good job bringing this one back to life :thumbup:
98-0034 (sold)
00-XXXX (sold)

practice chaos to develop control.

Vtecwreck
Posts: 178
Joined: Tue Aug 15, 2017 4:49 pm

Re: 98-0148 (From Rice to Nice)

Post by Vtecwreck » Fri Sep 07, 2018 12:08 pm

aklackner wrote: Tue Sep 04, 2018 10:10 pm Congratulations!!!

Did you pull the harness out of the hatch or the body?

Pulling the harness out of the body is much easier imho.

Then you can deal with the harness in the hatch off the car (and not upside down.
Thanks! When I removed it I pulled it from the hatch, I had it painted in and out. So in order to prevent any overspray or damages to the harness it was easier to remove it this way.
RTW DC2R wrote: Thu Sep 06, 2018 9:26 am Good job bringing this one back to life :thumbup:
Thank you :beer:
98-0148: DeRicing Project
viewtopic.php?f=5&t=264

Vtecwreck
Posts: 178
Joined: Tue Aug 15, 2017 4:49 pm

Re: 98-0148 (From Rice to Nice)

Post by Vtecwreck » Thu Oct 04, 2018 11:55 am

These updates are getting more sporadically than I expected. Since last update all that has happened is that I was able to figure out my front brake clearance problem. So a while back I traded my 36mm front spindles for 32mm, the guy I traded with told me he had just done bearings on them but he needed 36mm for his new k-series swap. Great, I thought I had avoided the hassle of finding correct axles (in retrospect it would not have been a big deal). When I was installing the front brakes, the rotor went in fine but when I installed the caliper bracket they rubbed. At first I thought it was the caliper bracket, maybe it had twisted or something along those lines. My cousin came by in his R so I had him try out my caliper bracket and it fit fine and most importantly it cleared the rotor fine. Next guess was the rotor, being a cheap OE style I figured there could be a chance they were a bit off. He took the rotors to work with him since he couldn't remove his rotor screws. To no surprise they fit perfectly fine. After much frustration and testing I decided to try spinning the spindles with the rotor mounted, turns out the hacker I traded spindles with pressed the hubs back in incorrectly. I took off the spindles and handed them to my uncle who works at Acura. I should be getting them back tomorrow.

As for the rear, when I purchased it the rear calipers were installed fine. I never thought I'd be experiencing the problem I am now so I never took pictures. After I cleaned up the rear spindles and painted them I was trying to install the calipers back on but for some reason the calipers only fit on the opposite side (R fits on L and L fits on R) upside down. The part on the caliper where the E-Brake bracket goes is hitting the trailing arm. I'm not sure if there is something missing or what. Maybe this weekend I'll use my Cousin's car as a reference if he's free. This has been the only part that I have been stumped on. Also this is the last thing needed before the car can be put down on all fours.

Also, I need to put the car away no later than October 15. Due to school getting a bit more intense around that time I wont be able to work on it anymore. If It is all done by that date it'd be great since I would be able to intermittently drive the car until they begin to call for snow. Also, that means that in the spring I'll be able to just do a bit of refreshing and just drive it.

Things I need to do by the 15th:

-Install Brakes
- Finish Installing E-Brake Cables
- Bleed Brake System
-Install Valve Cover Gasket
- Purchase and install Gromets
-Install DC Steering Column
- Install Steering Wheel
-Adjust Clutch Pedal
-Adjust Acel. Pedal Bracket
-Install Interior Panels
-Install Trunk Locking Mechanism
-Reglue Headliner
-Purchase, Paint, Install Rear Bumper Support
-Install Bodypanels
-Align BodyPanels
-Bleed Coolant System

I am positive more things will come up as I work on it some more. This is the last push to get it done before I have to put it away. 11 Days Left... Lots to do but as long as I line everything up properly I can have it all done in a day, two days tops. Pictures to come!
98-0148: DeRicing Project
viewtopic.php?f=5&t=264

User avatar
aw614
Posts: 569
Joined: Sun Aug 13, 2017 11:27 pm
Location: Tampa
Contact:

Re: 98-0148 (From Rice to Nice)

Post by aw614 » Thu Oct 04, 2018 12:02 pm

The rears aren't RSX/EP3 rear calipers? B/c they install upside down on EK/EG/DC
-Andrew Wong

Vtecwreck
Posts: 178
Joined: Tue Aug 15, 2017 4:49 pm

Re: 98-0148 (From Rice to Nice)

Post by Vtecwreck » Sat Oct 06, 2018 9:32 pm

aw614 wrote: Thu Oct 04, 2018 12:02 pm The rears aren't RSX/EP3 rear calipers? B/c they install upside down on EK/EG/DC
I was looking into this but I didn’t find anything about them installing upside down. I’m picking up a rear caliper tomorrow.
98-0148: DeRicing Project
viewtopic.php?f=5&t=264

User avatar
aklackner
Posts: 1095
Joined: Fri Dec 01, 2017 9:40 am

Re: 98-0148 (From Rice to Nice)

Post by aklackner » Sat Oct 06, 2018 10:52 pm

I still see the ITR rear calipers are available. When I originally sourced I ended up going new oem since it can be very hard to get right the ebrake cable bracket/holder.

Vtecwreck
Posts: 178
Joined: Tue Aug 15, 2017 4:49 pm

Re: 98-0148 (From Rice to Nice)

Post by Vtecwreck » Mon Oct 08, 2018 9:18 am

aklackner wrote: Sat Oct 06, 2018 10:52 pm I still see the ITR rear calipers are available. When I originally sourced I ended up going new oem since it can be very hard to get right the ebrake cable bracket/holder.
I contemplated this but autozone has a bracketed caliper for $70 + core. So I bought it just as a mock up, still does not fit.

Here’s what I found, I got completely f*cked on this 5 lug. The hacker I traded the front spindles for must’ve pressed the bearings in with a hammer. The initial 5 lug was a hacked up “poor-mans” set up. It has rear prelude hubs on stock integra trailing arms. So I’m just going to press my HR bushings out and buy another 5 lug from an importer... what I should’ve done from the beginning. Atleast this was I can get my car on the ground and rolling ASAP.

On the upside I was able to find a rear bumper support so I was able to install the rear bumper. Also since I am waiting on the new bearings for the front I cleaned them up and gave them a fresh coat of paint. They look much nicer and under all the grime was the original marking. Lastly, I put the rest of the interior together. Just missing the rear seat mat and plastic covers on the shifter and steering column. Here are some pictures:

Rear semi-lined up. Just have a few more adjustments to make.
IMG_4314.jpg
IMG_4314.jpg (528.35 KiB) Viewed 855 times
This just shows the seats and the optional rear strut bar. I was just putting on as much as possible as next weekend it goes away regardless if it runs or not.
IMG_4322.jpg
IMG_4322.jpg (576.94 KiB) Viewed 855 times
As for the frankenstien 5-lug, the rear calipers are off a 02-06 RSX. They have the same stamping as the ITR calipers but except they do not bolt up because the clearance of the trailing arms. They were bolted on the opposing side (left caliper was bolted upside down on the right trailing arm). Here's what it looked like when I tried to install them correctly;
IMG_4190.jpg
IMG_4190.jpg (664.75 KiB) Viewed 855 times
IMG_4191.jpg
IMG_4191.jpg (559.36 KiB) Viewed 855 times
Last edited by Vtecwreck on Sun Jan 29, 2023 6:06 pm, edited 1 time in total.
98-0148: DeRicing Project
viewtopic.php?f=5&t=264

Post Reply

Who is online

Users browsing this forum: Dc2-ProductionS and 0 guests